“Pai Wordpress Version” Documentation by “Peerapong Pulpipatnan”
“Pai Wordpress Version”
Created: 22/10/2010
By: Peerapong Pulpipatnan
Thank you for purchasing my theme. If you have any questions that are beyond the scope of this help file, please feel free to email via my user page contact form here. Thanks so much!
Table of Contents
A) Getting Started - top
In order to begin installing Pai theme. You need the latest version of Wordpress. Here is the download URL. Once you downloaded and set it up, You are ready to go.
Installation
Upon downloading the package, you will have an "Pai" folder inside the theme package. Upload this folder to your themes folder at: your WordPress installation root directory /wp-content/themes
Log into WordPress administration and click on the Appearance >> Themes tab. After that is done, activate the theme as you would activate any other theme.
Note: You have to set /cache folder of Pai writable (chmod 777)Import Sample Contents
If you want to import sample contents (the same contents show in live preview). Go to your Wordpress admin > tools > import and install Install the WordPress importer
Run the importer and select the file name "sample_contents.xml" in your theme folder. You need to check Download and import file attachments and then import!
My Tab Content look incorrect, What should I do?
Normally Wordpress will automatically add paragraph tag to your content so it will create a space between tab and its content. You can solve this by using Text-control plugin. Download here
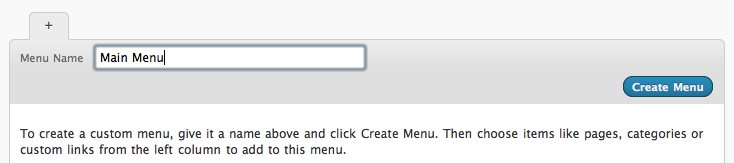
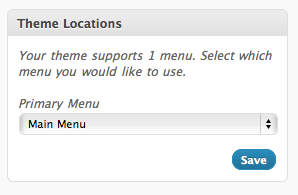
Setup Main Menu
Go to Appearance > Menus then click "Create Menu". Add items to your menu and select Theme location. In live preview I created a menu name "Main Menu" and select menu location name "Primary Menu".
For those who are not familiar with Wordpress 3.0 menu below are some tutorials.
- http://templatic.com/news/wordpress-3-0-menu-management
- http://www.wonderhowto.com/how-to-use-new-menu-system-wordpress-3-0-thelonious-376792/
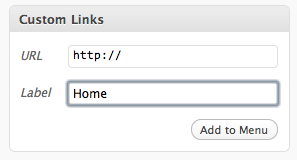
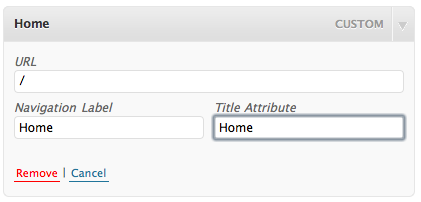
Setup "Home" menu
Go to Appearance > Menus then on the left of screen. You will see "Custom Link" box. Enter your URL and name "Home" then add to menu. Then on the right, you will see "Home" item show up. Enter its title attribute "Home".
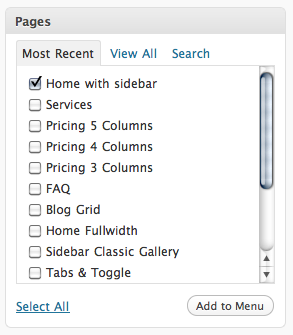
How to add page to menu?
There is a page box on the left side of menu page. Select which page you want to add then click "Add to menu".
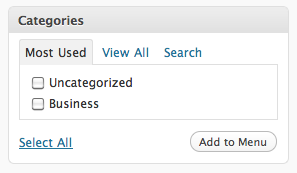
How to add category to menu?
There is a category box on the left side of menu page. Select which category you want to add then click "Add to menu".
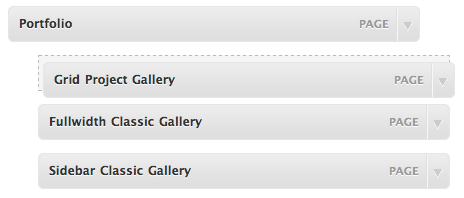
How to add a submenu?
On the main menu box. Drag sub menu item into parent item and click on "Save menu". See below picture.
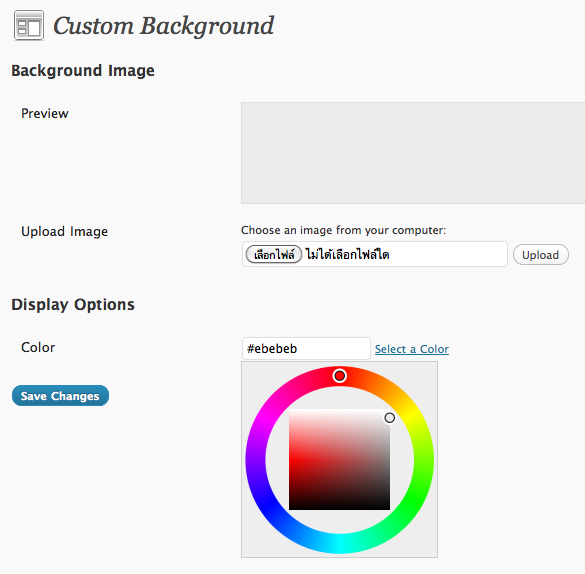
How to change background color or upload my background image?
Go to Appearance > background then select the color you want or click on "upload image" to upload your own background.
General Options
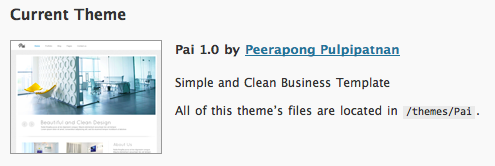
Upon activating the theme, from your WordPress admin panel, you will notice the "Pai" options tab at the bottom of your WordPress admin panel menu options. Click on it. You will open the admin panel of Pai.
You'll see that your current theme options page is broken up into 7 sections "General" "Homepage" "Portfolio" "Sidebar" "Blog" "Contact" "Footer" Clicking on any of these option names will popup that options content.
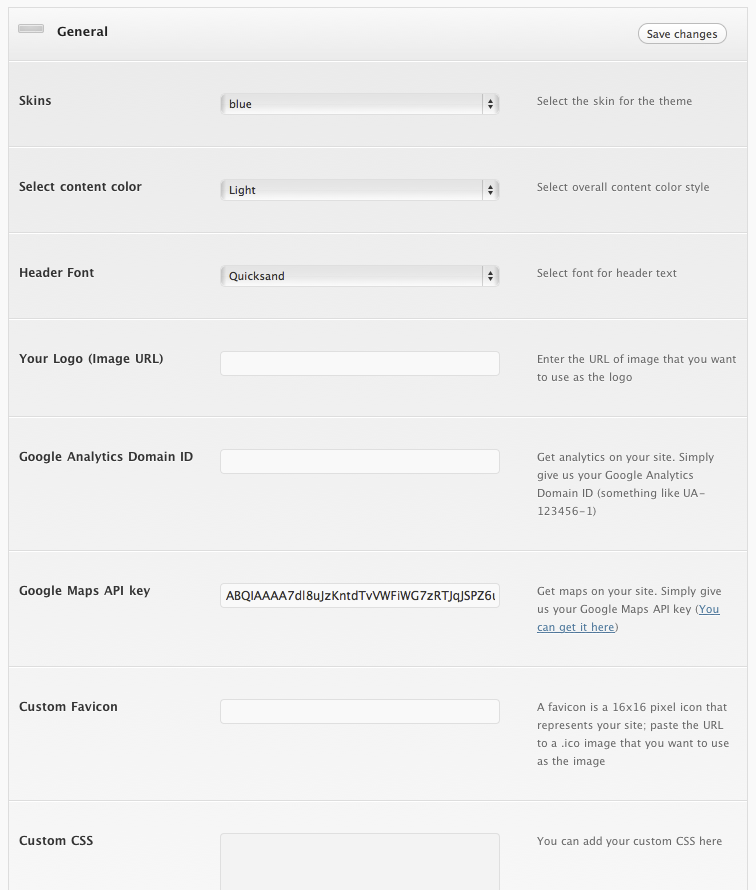
- Select the skin for the theme
- Select overall content color style
- Select font for header text
- Enter the URL of image that you want to use as the logo
- Get analytics on your site. Simply give us your Google Analytics Domain ID (something like UA-123456-1)
- Get maps on your site. Simply give us your Google Maps API key
- A favicon is a 16x16 pixel icon that represents your site; paste the URL to a .ico image that you want to use as the image
- You can add your custom CSS here
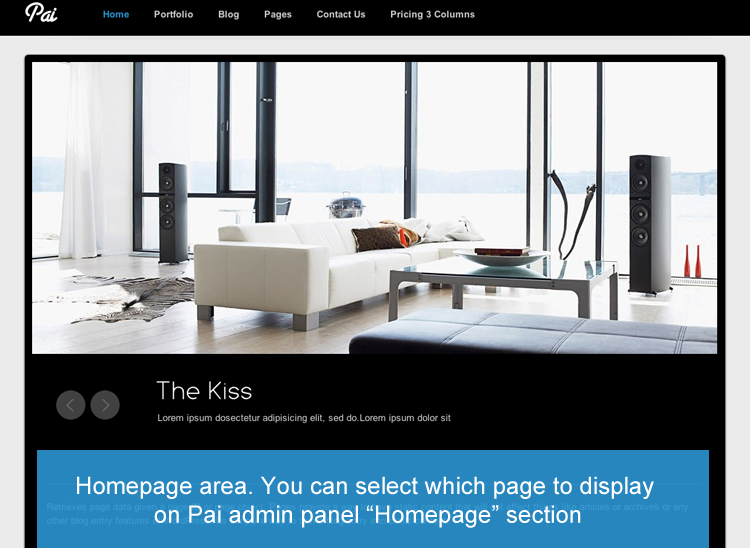
Homepage Options
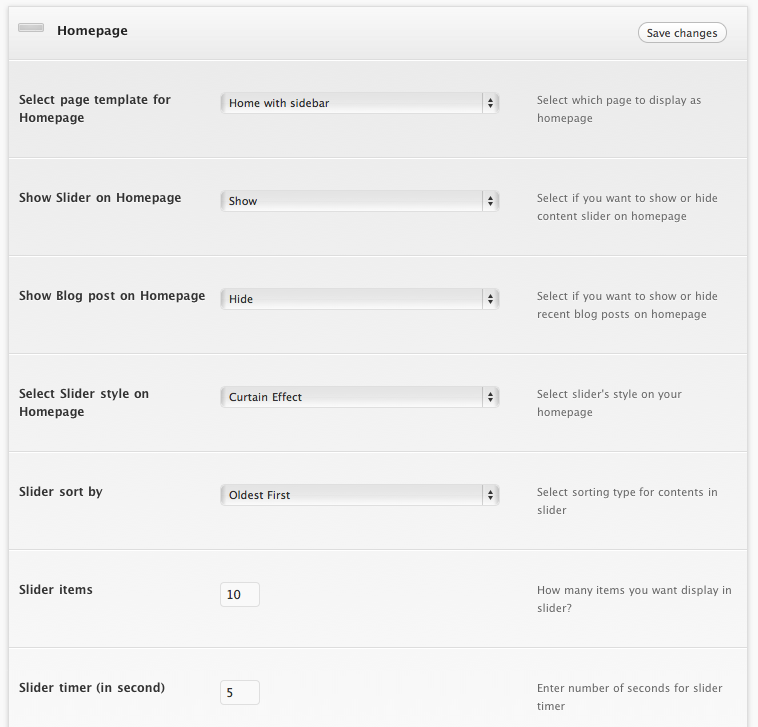
- Select which page to display as homepage.
- Select if you want to show or hide content slider on homepage
- Select if you want to show or hide recent blog posts on homepage
- Select slider's style on your homepage
- Select sorting type for contents in slider
- How many items you want display in slider?
- Enter number of seconds for slider timer
Portfolio Options
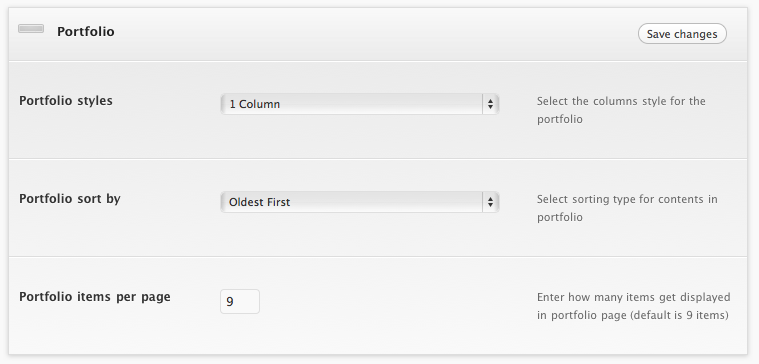
- Select the columns style for the portfolio
- Select sorting type for contents in portfolio
- Enter how many items get displayed in portfolio page (default is 9 items)
How to create a portfolio page?
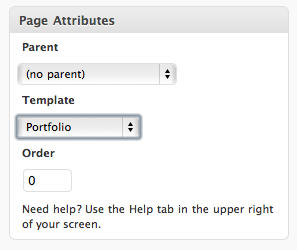
Go to add new page and you will find "Page Attributes" on the right side. Select "Portfolio".
Sidebar Options
You can create dynamic side bar via this option. Just enter your sidebar name and save. Then on add new page, you will see a sidebar option like below image. Select the one you would like to use.
Blog Options

- Enter title text to display in Blog template
- Select your blog layout
How to create a blog page?
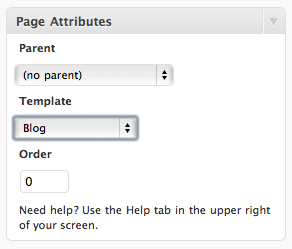
Go to add new page and you will find "Page Attributes" on the right side. Select "Blog".
Contact Options
Enter which email address will be sent from contact form.
How to create a contact page?
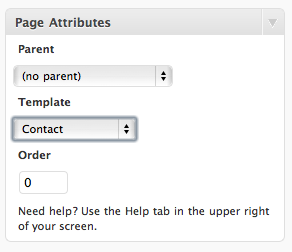
Go to add new page and you will find "Page Attributes" on the right side. Select "Contact".
Footer Options
Enter footer text ex. copyright description.
How to add content to homepage slider?
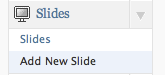
On the left of Wordpress admin, you will see a Slides box. Click on "Add New Slide".
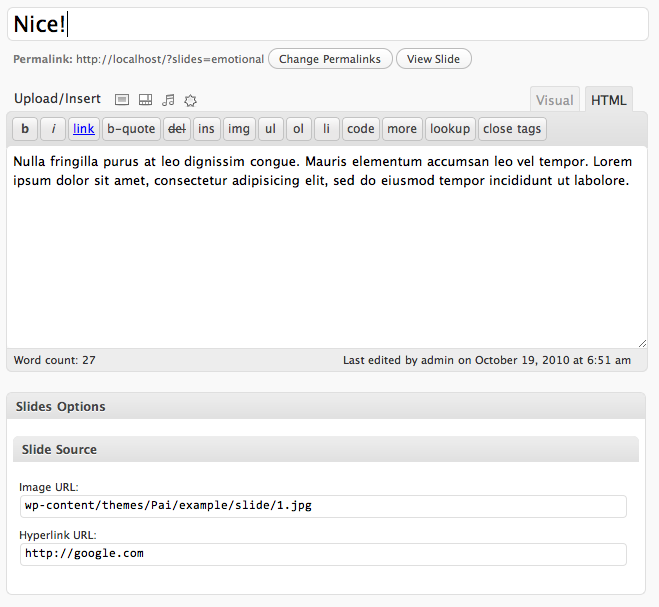
Enter slide's title, description and below you will see "Slides Options". Enter your image path (only on your server, hotlink image is not support)
How to add a new portfolio?
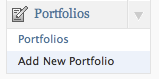
On the left of Wordpress admin, you will see a Portfolios box. Click on "Add New Portfolio".
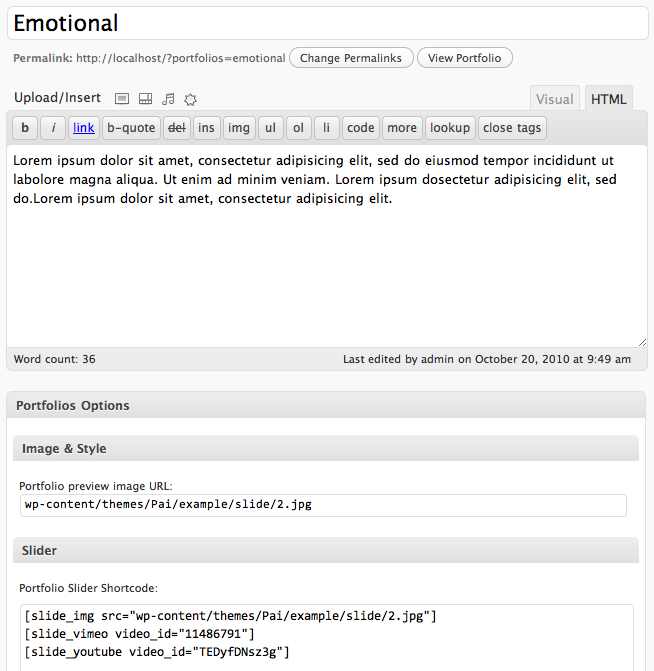
Enter slide's title, description and below you will see "Portfolios Options". Enter preview image URL.
How to add a content slider to each portfolio item?
In above "How to add a new portfolio?" instructions. You will see "Portfolio Slide Shortcode". It use to generate a slider via Wordpress shortcode. Here is an available shortcode.
Image Content Slide shortcode
[slide_img src="{image_url}"]
Example usage code:
[slide_img src="wp-content/themes/Pai/example/slide/2.jpg"]
Vimeo video Slide shortcode
[slide_vimeo video_id="11486791"]
Youtube video Slide shortcode
[slide_youtube video_id="TEDyfDNsz3g"]
Note: Replace red text with your data
How to add contents to homepage?
How to add fullwidth or sidebar for homepage style
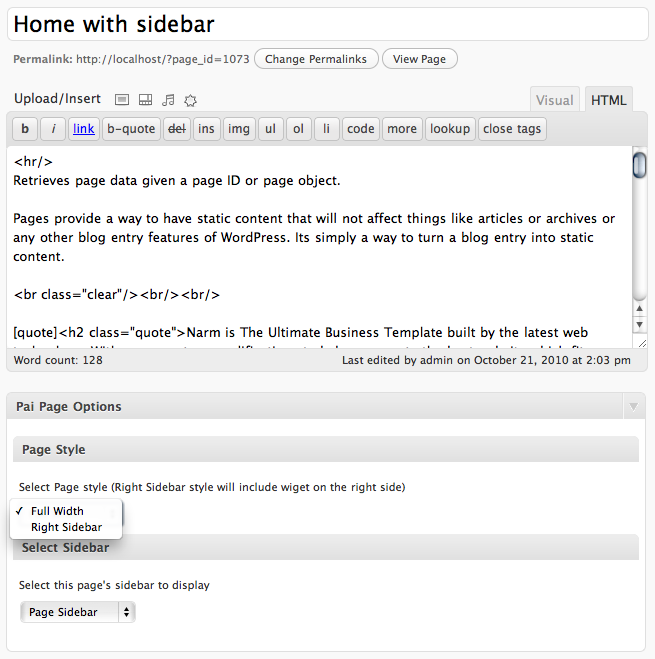
- Create a new page and enter title and content. Then below you will find Pai Page Options. Select page style from "Fullwidht" or "Right Sidebar". If you select sidebar style, you can also which sidebar to display.
Pai custom widgets
However the homepage sidebar is support all Wordpress 3.0 widgets. I created some custom widgets to make your website more interesting below are the list and how to use it.
Pai Portfolio widget
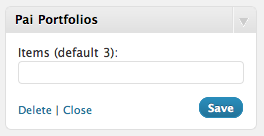
You can enter number of portfolio items, you would like to display.
Pai Recent Posts widget
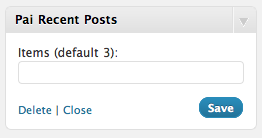
You can enter number of posts, you would like to display.
Pai Popular Posts widget
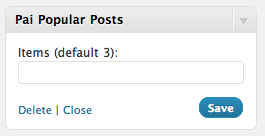
You can enter number of posts, you would like to display.
Pai Contact Form widget
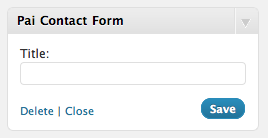
Display contact form.
Pai Flickr widget
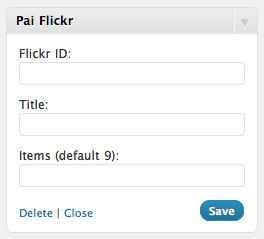
Display your Flickr photostream. Find your Flickr ID here
Pai Map widget
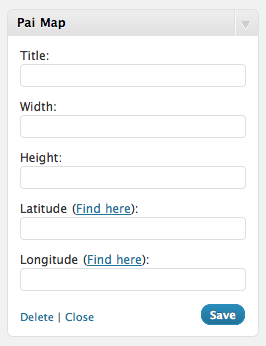
Display Google Map
Pai Social Media Icon widget
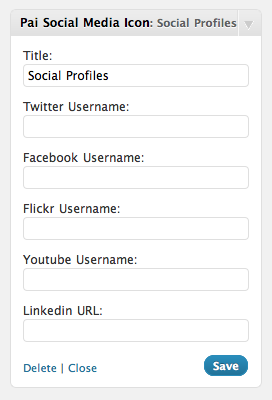
Display your social media profile
Pai Twitter widget
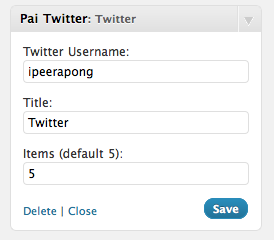
Display your Twitter timeline
Pai Vimeo video widget
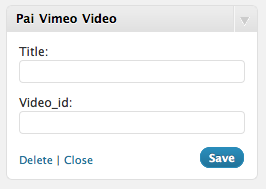
Display Vimeo Video
Pai Youtube video widget
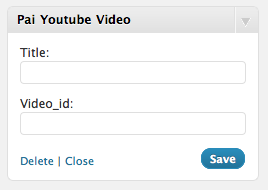
Display Youtube Video
How to make a space break between div?
Simply use below code to add space break for your content
<br class="clear"/>
Widget
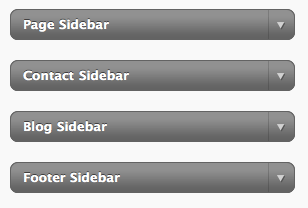
Pai has 3 ready made widgets.
- "Page Sidebar" will show on other pages sidebar.
- "Contact Sidebar" will show on contact page.
- "Blog Sidebar" will show on blog and single blog post page.
- "Footer Sidebar" will show on footer.
You can also add your sidebar via Pai Admin panel.
To add content to sidebar simple go to Appearance > Widgets and drag item into certain sidebar.
Sidebar widget with shortcode support
You can also add shortcode to sidebar widget, simply select "Text" type for your widget and enter shortcode to it.
Page styles "Full width" or "Right Sidebar"
Pai has 2 page style, "Full width" and "Right sidebar. To select page style. Go to add new page. Fill enter the title field and description. Go to Pai Page Options then select page style box.
Shortcode
Pai has many built-in shortcode to help display your content properly.
Dropcap
[dropcap]Your content...[/dropcap]
Quote Text
[quote]Your content...[/quote]
Picture Frame align left
[frame_left src="{image_url}" href="{full_size_image_url}"]This is caption[/frame_left]Your content...
Picture Frame align right
[frame_right src="{image_url}" href="{full_size_image_url}"]This is caption[/frame_right]Your content...
Picture Frame align center
[frame_center src="{image_url}" href="{full_size_image_url}"]This is caption[/frame_center]Your content...
Gallery
[pp_gallery]
	<a href="example/post1.png"><img src="example/thumb1.jpg" alt="" /></a>
	<a href="example/post1.png"><img src="example/thumb2.jpg" alt="" /></a>
[/pp_gallery]
Arrow list
[arrow_list]
	<li>Item #1</li>
	<li>Item #2</li>
	<li>Item #3</li>
[/arrow_list]
2 columns contents
[one_half]Your Content...[/one_half]
[one_half_last]Your Content...[/one_half_last]
3 columns contents
[one_third]Your Content...[/one_third]
[one_third]Your Content...[/one_third]
[one_third_last]Your Content...[/one_third_last]
2/3 columns contents
[two_third]Your Content...[/two_third]
[one_third_last]Your Content...[/one_third_last]
4 columns contents
[one_fourth]Your Content...[/one_fourth]
[one_fourth]Your Content...[/one_fourth]
[one_fourth]Your Content...[/one_fourth]
[one_fourth_last]Your Content...[/one_fourth_last]
5 columns contents
[one_fifth]Your Content...[/one_fifth]
[one_fifthYour Content...[/one_fifth]
[one_fifth]Your Content...[/one_fifth]
[one_fifth]Your Content...[/one_fifth]
[one_fifth_last]Your Content...[/one_fifth_last]
6 columns contents
[one_sixth]Your Content...[/one_sixth]
[one_sixth Content...[/one_sixth]
[one_sixth]Your Content...[/one_sixth]
[one_sixth]Your Content...[/one_sixth]
[one_sixth]Your Content...[/one_sixth]
[one_sixth_last]Your Content...[/one_sixth_last]
Toggle Content
[accordion title="This is title"]Your Content...[/accordion]
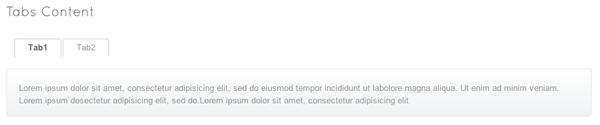
Tabs Content
[tabs tab1="Tab1" tab2="Tab2"]
	[tab id=1]This is tab1[/tab]
	[tab id=2]This is tab2[/tab]
[/tabs]
Recent Posts and Popular Posts
[recent_posts]
[popular_posts]
Pricing Boxes
[pricing title="Starter Package" column="4"]
[pricing title="Standard Package" size="large" column="4"]
[pricing title="Premium Package" column="4"]
[pricing title="Pro Package" column="4"]
You can change the width of pricing box (3, 4, 5 columns) by add attribute "column". The size attribute equal "large" make the box stand out from others (recommend package)
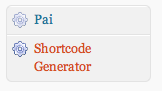
Shortcode Generator
Pai also come with built-in plugin called "Shortcode Generator" which will help you create theme's shortcode from GUI. Simply click on "Shortcode Generator" once you activate the theme.
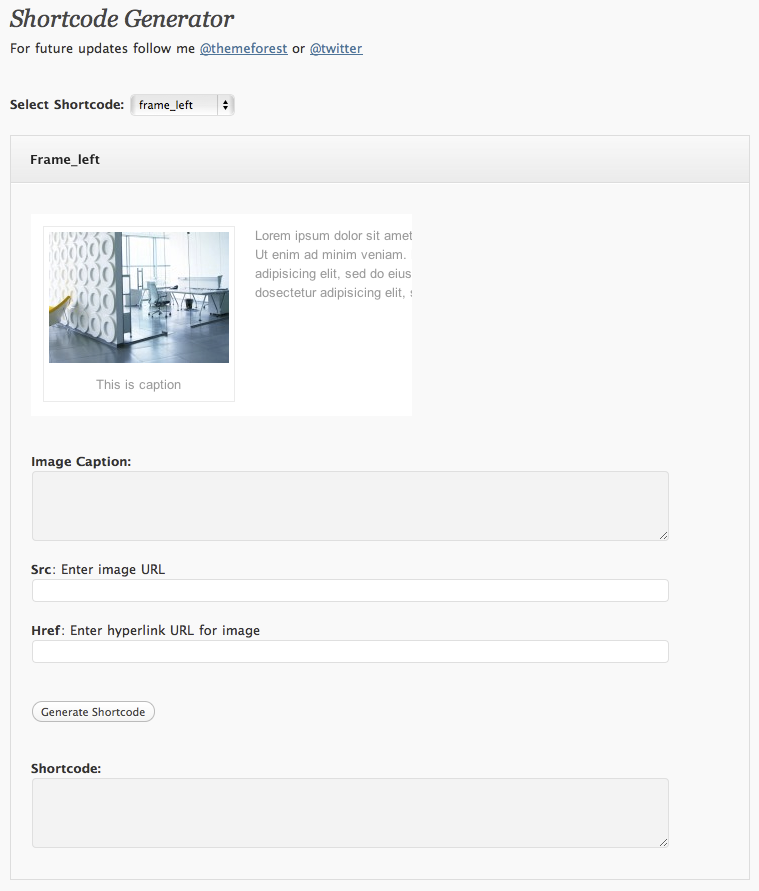
Select shortcode type you want to add then enter its contents. Click on "Generate Shortcode" and copy all code inside Shortcode box. Go to your post or page paste the code to its content.
B) CSS Files and Structure - top
I'm using five CSS files in this theme. The first file contains all of the specific stylings for the page. The file is separated into sections using:
	/* CSS Reset */

	some code

	/* Global layout */

	some code

	/* Input layout */

	some code
The second file is a styling for jQuery UI element.
The third file is a styling for skins.
The fourth file is a styling for modal window.
The fifth file is a styling for content color.
If you would like to edit a specific section of the site, simply find the appropriate label in the CSS file, and then scroll down until you find the appropriate style that needs to be edited.
C) JavaScript - top
This theme imports ten Javascript files.
- jQuery
- jQuery UI
- jQuery Validate
- jQuery fancybox
- jQuery hint
- jQuery anythingSlider
- jQuery nivoslider
- jQuery Roundabout
- jQuery easing
- Browser check
- Custom script
- jQuery and jQuery UI are a Javascript library that greatly reduces the amount of code that you must write.
- jQuery validate contact form
- jQuery Fancybox create a nice popup window using in gallery
- jQuery hint for search box
- jQuery anythingSlider for homepage and portfolio slider
- jQuery nivoslider for homepage slider
- jQuery Roundabout for homepage slider
- jQuery easing for slider transition effect
- Browser check check browser name and version
- Most of the animation in this theme is carried out from the customs scripts.
D) PSD Files - top
I've included one psd with this theme and it is a main layout of template.
E) Sources and Credits - top
I've used the following script, images, icons or other files as listed.
- jQuery UI http://jqueryui.com/
- jQuery validate http://bassistance.de/jquery-plugins/jquery-plugin-validation/
- jQuery Fancybox http://fancybox.net/
- jQuery anythingSlider http://css-tricks.com/anythingslider-jquery-plugin/
- jQuery nivoslider http://nivo.dev7studios.com/
- jQuery Roundabout http://fredhq.com/projects/roundabout/
- jQuery validate http://bassistance.de/jquery-plugins/jquery-plugin-validation/
- jQuery hint http://remysharp.com/2007/01/25/jquery-tutorial-text-box-hints/
- Fonts for commercial use http://www.fontsquirrel.com/
Once again, thank you so much for purchasing this theme. As I said at the beginning, I'd be glad to help you if you have any questions relating to this theme. No guarantees, but I'll do my best to assist. If you have a more general question relating to the themes on ThemeForest, you might consider visiting the forums and asking your question in the "Item Discussion" section.
Peerapong Pulpipatnan